
The Pant PDF Sewing Pattern is here!
I am SO excited, the Pant PDF Sewing Pattern is finally here, and it is fabulous!
I’ve decided to let my pattern tester, Ann take the reins as a guest blogger and let her tell her thoughts and experience creating the pants, working with denim and other cooler weather fabrics, as well as some fun styling tips! Enjoy!
The Ann Normandy Pants are a beautifully fitted pant with lovely details and a slow-sewing level of finishing.
From the pattern cover: Flattering and impeccably fitting classic flat front pants, with side zipper and deep welt pockets. Snug around the hips, straight leg with flared gussets on inseam and side seam to give a wide-legged appearance without bulk.


My first impression of these was wide leg trouser jeans – and I think that impression still holds true after sewing them in denim. I selected dark rinse denim with slight stretch (about 1-2%,) The fabric was stashed for a long, long time, so I don’t exactly recall the weight – my guess is it’s about a 10oz denim with about 2% stretch.
I’m all for fast sewing usually, but I wanted to take my time and appreciate the details like flat-felled seams, flat-felled godets and true, authentic denim topstitching. The pants have a deep welt pocket at the waist that was surprisingly easy to sew. I usually avoid any pattern with mention of “welt pockets,” but this one was clear, easy and came out very well. This pocket is reportedly large enough for a large smartphone and fits my iPhone 7. Note my phone does stick up out of the top of the pants, but a simple alteration to your pocket would be to lay your smartphone on the pocket pattern piece and make adjustments accordingly. The pocket sewing isn’t determined by the length of it (as that’s inside the pant leg.)

The pants are very well drafted. I make a lot of pants from various designers, and invariably I’m making substantial changes to rise, and shaping at the waist. I made only one alteration – I cut the next size up (M to L) from the high hip to waist, as I’m thicker through my middle these days. The pants DO have ¾” seam allowances on all seams, so when you fit, be sure you are pinning that ¾” so you’re not surprised when you first put them on. In retrospect, I did NOT need this waist adjustment and should have just sewn my usual size M/10-12. I ended up taking the extra room out when I sewed the CF and CB.
I did not make a muslin or test garment on these pants. I am testing them, to begin with, so I opted to just cut them in my size based on the measurements on the pattern insert. I fit a size M closest. When I make these again, I will take out ½” in the front rise tapering to 0 at the side seam, and I will add ½” to the back rise, tapering to 0. This is an alteration I do for my body type – I am short-waisted with a round booty! This is the least adjustment I’ve ever made on a pair of pants (ever.)
As I was sewing these pants (session 2, about 2 hours into the total sewing process), I was letting my mind wander. These pants really channel my inner French girl. Besides being called Ann Normandy (bringing to mind the coast of France where Normandy is located) I’m sewing them in, well, denim, aka “des Nimes”, where we get the name Denim. The shape – fitted with a graceful wide leg flare from the godets – is very French girl. I plan to wear these with a classic striped Breton tee. My inner French girl loved the slow construction (on my part) taking the time to carefully pin the flat felled seams for the authentic denim topstitching. I ran out of denim topstitching thread though, so I was a couple of days behind my intended schedule. I use a Gutermann jeans topstitching thread for denim. It goes through your denim/jeans needle on your machine beautifully and creates an exact authentic look for topstitching. It’s thicker than regular thread.

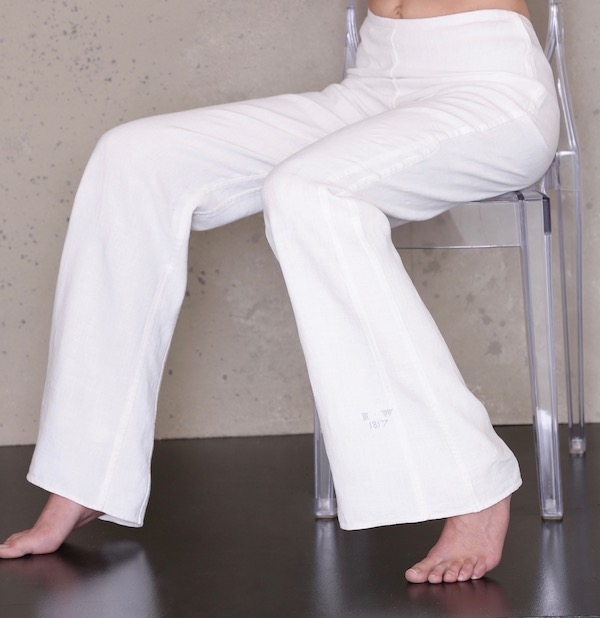
As for the construction details, they are very carefully photographed (in white linen) so be sure you are printing these instructions in color or using your laptop or tablet (better yet) to zoom in on them as you construct them. Once you do one of the flat-felled godets, you’ll get how they go, and the remainder of them are easy to construct. I did the two outer ones with denim topstitching thread on the needle side (sewing from the right side), and the two inner ones using black sewing thread only.
I did frog stitch a few things, but these were no fault of anyone except me not reading the instructions carefully. I highly recommend you read them through once and then read them slowly and line by line as you sew the pants.
Flat felling the inner leg seams:
If you take a look at your commercial jeans, one seam is flat-felled; the other is not. The reason for this is it’s hard to flat-fell two seams on the same leg! These pants make it easier by their order of construction and their width at the hem, but at some point, you will be sewing inside a tube of the pant leg and it will be challenging at first. I did part of the flat fell up from the bottom on both sides of the godet and part of it from the godet down on both sides; this seemed to work well. I sewed the rest of the inner leg seam after the godet, as instructed. Don’t be alarmed, go slowly, make sure you’re not sewing over another overlapped section of pant leg as you go.
With these beautiful details, they do take more time-bound pocket edges, flat-felled seams, topstitching – but it’s worth it, and it’s a delightful and rewarding experience. I’ve resisted sewing jeans because it’s so easy (and inexpensive, if I shop eBay) to buy my favorite Levi’s. These are trousers, and as such the denim version is a luxe and office-worthy pursuit of sewing denim pants.

Wearing and styling:
I hemmed and hawed (pun intended) on hemming these – not for any technical reason, but because I wasn’t sure I wanted to hem them for flats or heels. I rarely wear heels much anymore. But I have two beautiful pairs of wedge suede boots that I love to wear with trousers. I washed the jeans twice on warm water and a medium warm dryer (I usually do not dry my jeans) to shrink the denim before hemming. Most denim shrinks 1- 1 ½ in length, so be sure yours is prewashed twice.
If you’re sewing with denim, you need a Jean-a-ma-jig or a hump jumper to sew the hem. I started without it, and boy, it wasn’t fun. The hump jumper is an angled piece of plastic that has two open comb-style ends. One side is thicker than the other. You put it under your presser foot from the rear when going up over the hump (usually the thicker side), and then under the front when coming down the hump of the flat felled seams (the thinner side). I also pressed like mad before sewing the hem. Some people use a small hammer to hammer down the jeans’ flat felled seams at the hem. I didn’t have a hammer handy. But the hump jumper worked reasonably well with only a few small snarly threads underneath the stitching.
What to wear with the Ann Normandy pants (in denim):
These are denim, and it’s winter, so cashmere anything! I have a couple of cashmere turtlenecks and a cashmere ruana. The pants look as elegant as these sweaters and are a great match.
I also love a cropped, slightly boxy jacket (aka “Chanel”) jacket in boucle and faux fur as well. A faux fur vest would be delicious with these pants. I also plan to make and wear a long (knee length), striped swing jacket with fringed Venetian-style lace trim – in short, anything that feels and looks luxe is an excellent choice for these pants if you’re sewing them from denim or heavy linen. For summer, a breezy top (Ann Normandy cropped cold shoulder top is a natural fit) is an ideal choice. I’ll absolutely be wearing these with my Breton tee and luxe sneakers in silver metallic leather. For date night, I plan to wear these with a cream ribbed turtleneck sweater and a handmade sweater knit wrap closed with an antique jeweled brooch.

These pants are well worth your time. They are exceptionally well-drafted, with interesting details that you can accent with topstitching or unique fabrics.
Fabric suggestions for winter sewing of your Ann Normandy Pants:
White denim – white in the winter is stunning with charcoal and heather gray. It looks beautiful and luxe with cream and camel.
It also moves right into spring with navy and green and slides into summer with anything. I know, white in winter? What? But if you’re in a non-snowy but cold climate in the winter, you’ll be fine. I’m in Michigan where it alternates beautiful fresh white snow and gross rain-snow brown piles of dirty snow. I suggest OxiClean and dark colored boots on those days (or skip the white til it’s freshly snowed or dry pavement.)
Dark rinse denim – I’ve sewn mine in this, and these are absolutely appropriate for work. I’ve deemed these my “client jeans.” With my work-at-home and nomadic work travel lifestyle, I don’t need formal clothes (in fact, when I work from home, I rarely wear shoes!) and these jeans fit the bill of professional-looking yet are still jeans.
Velvet – I think a low-pile velvet or velveteen would be stunning for these pants. The designer cautioned me against baby wale corduroy with the gussets, but the non-ribbed cousin, low pile velveteen would be yummy.
Take the plunge with these pants – you won’t be disappointed in the beautiful construction details, the fit or the final result. And that’s the measure of a good sewing pattern, one that you’re delighted with both the process and the outcome!

Pant PDF Sewing Pattern
Sale Price:$16.11 Original Price:$18.95